Before you can get started- You must have an Amazon SES account.
If you already have Amazon SES account - Please Skip to Step 2
Step 1: Open aws.amazon.com/ses and click on “Sign in to the console” button
Step 2: On this page - Enter your email & Select " I am a new user"
- Follow the steps as requested by Amazon.
The steps will include your Payment Information, Contact Information & Your Support Level.
- For Support Level - Select "FREE"
Step 3: Once you have created an account.
You should see a screen like this: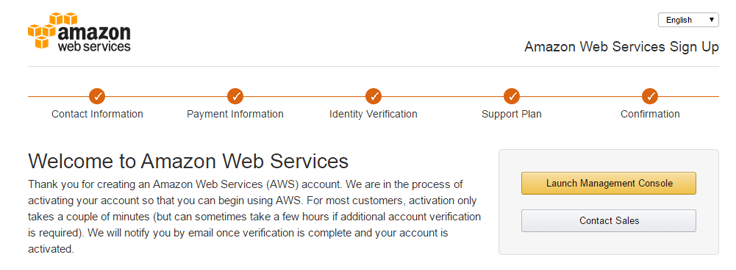
Step 4: Click on Management Console then Select "SES"
Preview Image: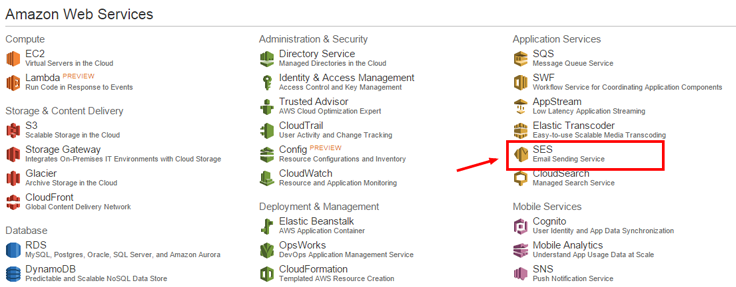
In RARE cases- It may take 20-30 minutes before your account is activated but normally 4-5 minutes.
You may see a bar like this.- Do not panic- Its normal.
Step 5: Request Production Access
Once you have recevied your "Welcom" email. Go to console and click the "SES" icon. You will see
an screen similar to below.

Click on " REQUEST PRODUCTION ACCESS"
Now, Its time to fill out a short form. They basically want to know how
you will use the API. Just put, Its to send out updates for your customers for your business.
Note: Once you have filled out the form. Click "Web" for Contact method. There is no "send msg" button.
People often get confused. Just giving you a heads up.
Now Examine this form carefully: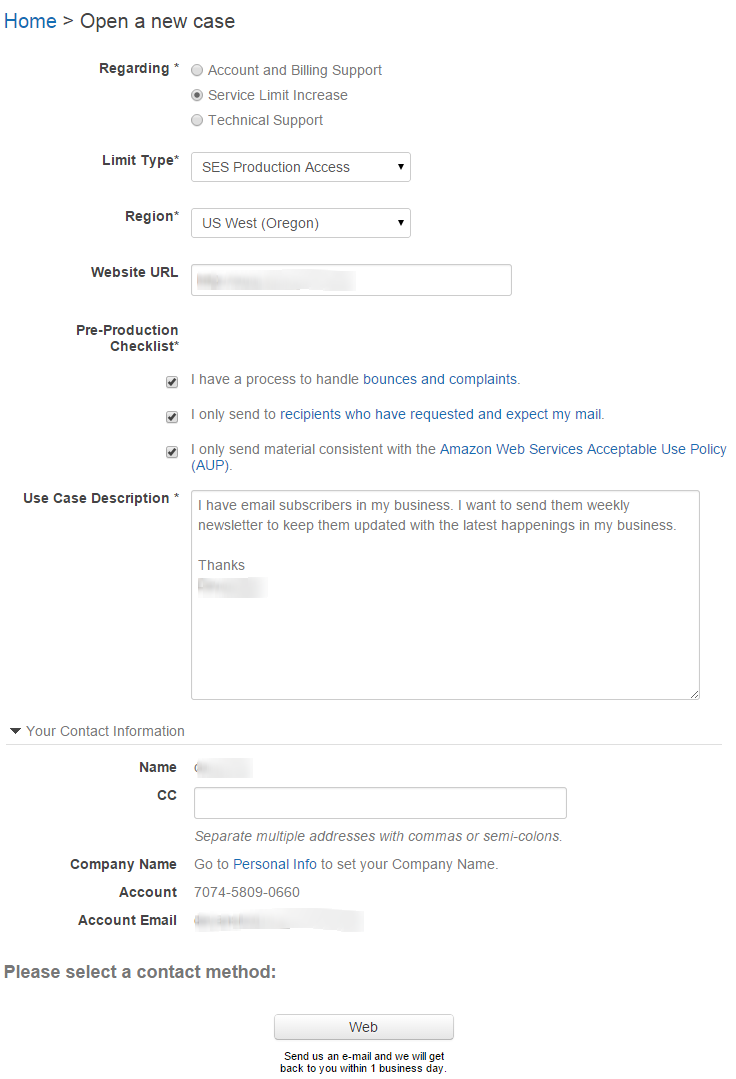
Step 6. Wait for Welcome Email.
Amazon Support is off on weekends - They will accept your application usually within 30 minutes but
24 hrs is normal.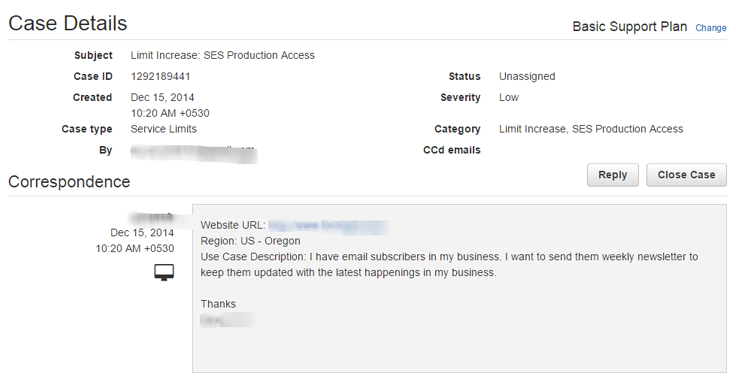
Step 7. Welcome Letter- You will get an email like this! 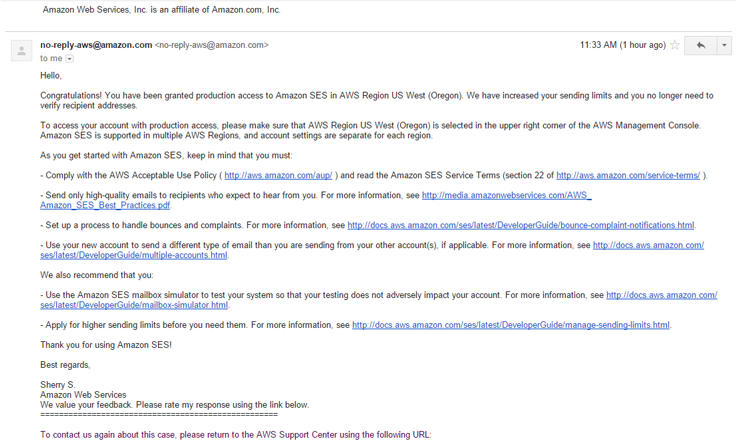
Step 8 : Verify your email
On this step- You will verify the email addresses you will be sending your emails with.
You can verify AS MANY EMAILS as you like.
This emails should be the "from" email on InboxSumo when asked for.
Now click on the SES icon like you did before. Then you should
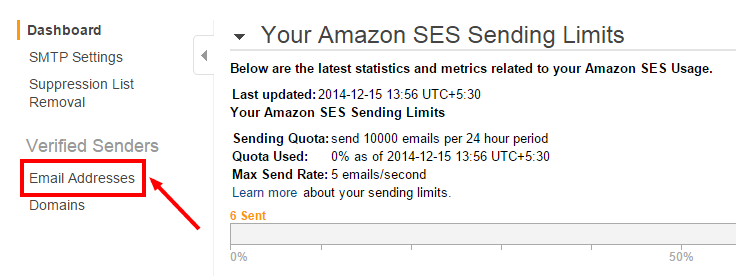
see a similar window like this and on the left under Verified Senders > Email Addresses
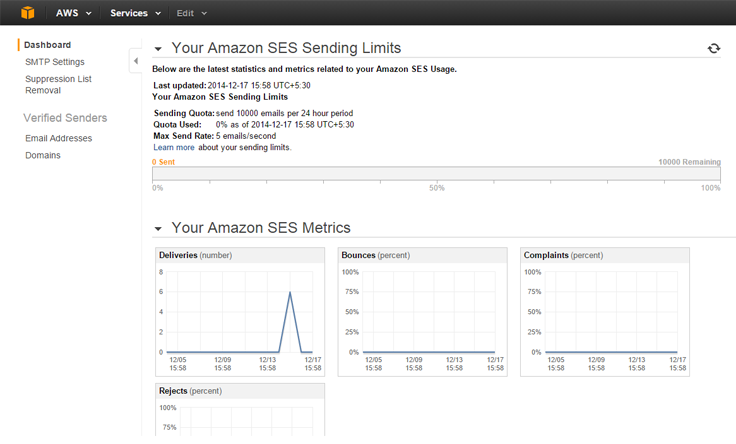
Click on Verified Senders > Email Addresses
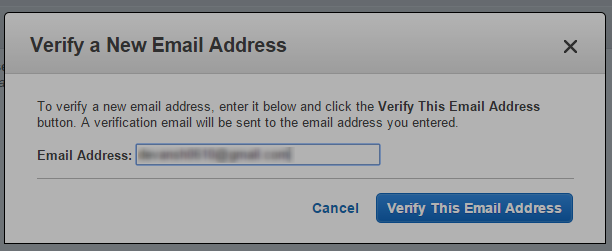
Enter an email address and click "Verify this email address" Then you should go check your email
to click the activation URL
Once you have verified your email address then you will get a screen like this.
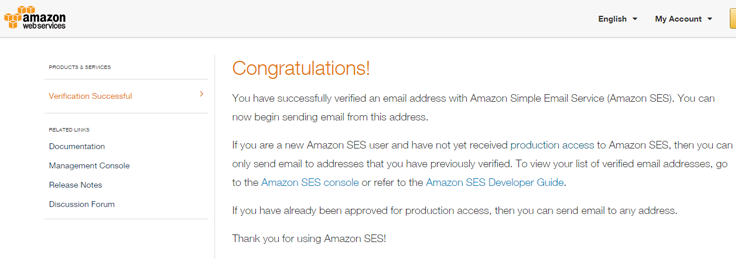
We are now done with Amazon SES setup! Please visit STEP 2 to input your API information on InboxSumo

